Showing posts with label soil amendment. Show all posts

Friday, September 30, 2022

Waiting for Rain on the West Coast

by Kathleen Sayce 

The astronomical calendar has rotated into autumn: Rain and cooler weather bring mushrooms, migrating birds and salmon, and new growth for many types of irises.  Here on the West Coast, it’s time to plan fall lifting, dividing, and replanting of Pacifica irises.
Wait for your plants to show fresh white roots that are at least two inches long. If you have access to irrigation water, water thoroughly a few times in September and October to help encourage Pacifica irises to break summer dormancy. Watering is needed only when replanting, and not weekly thereafter (unless it doesn’t rain for weeks and the soil dries out). 

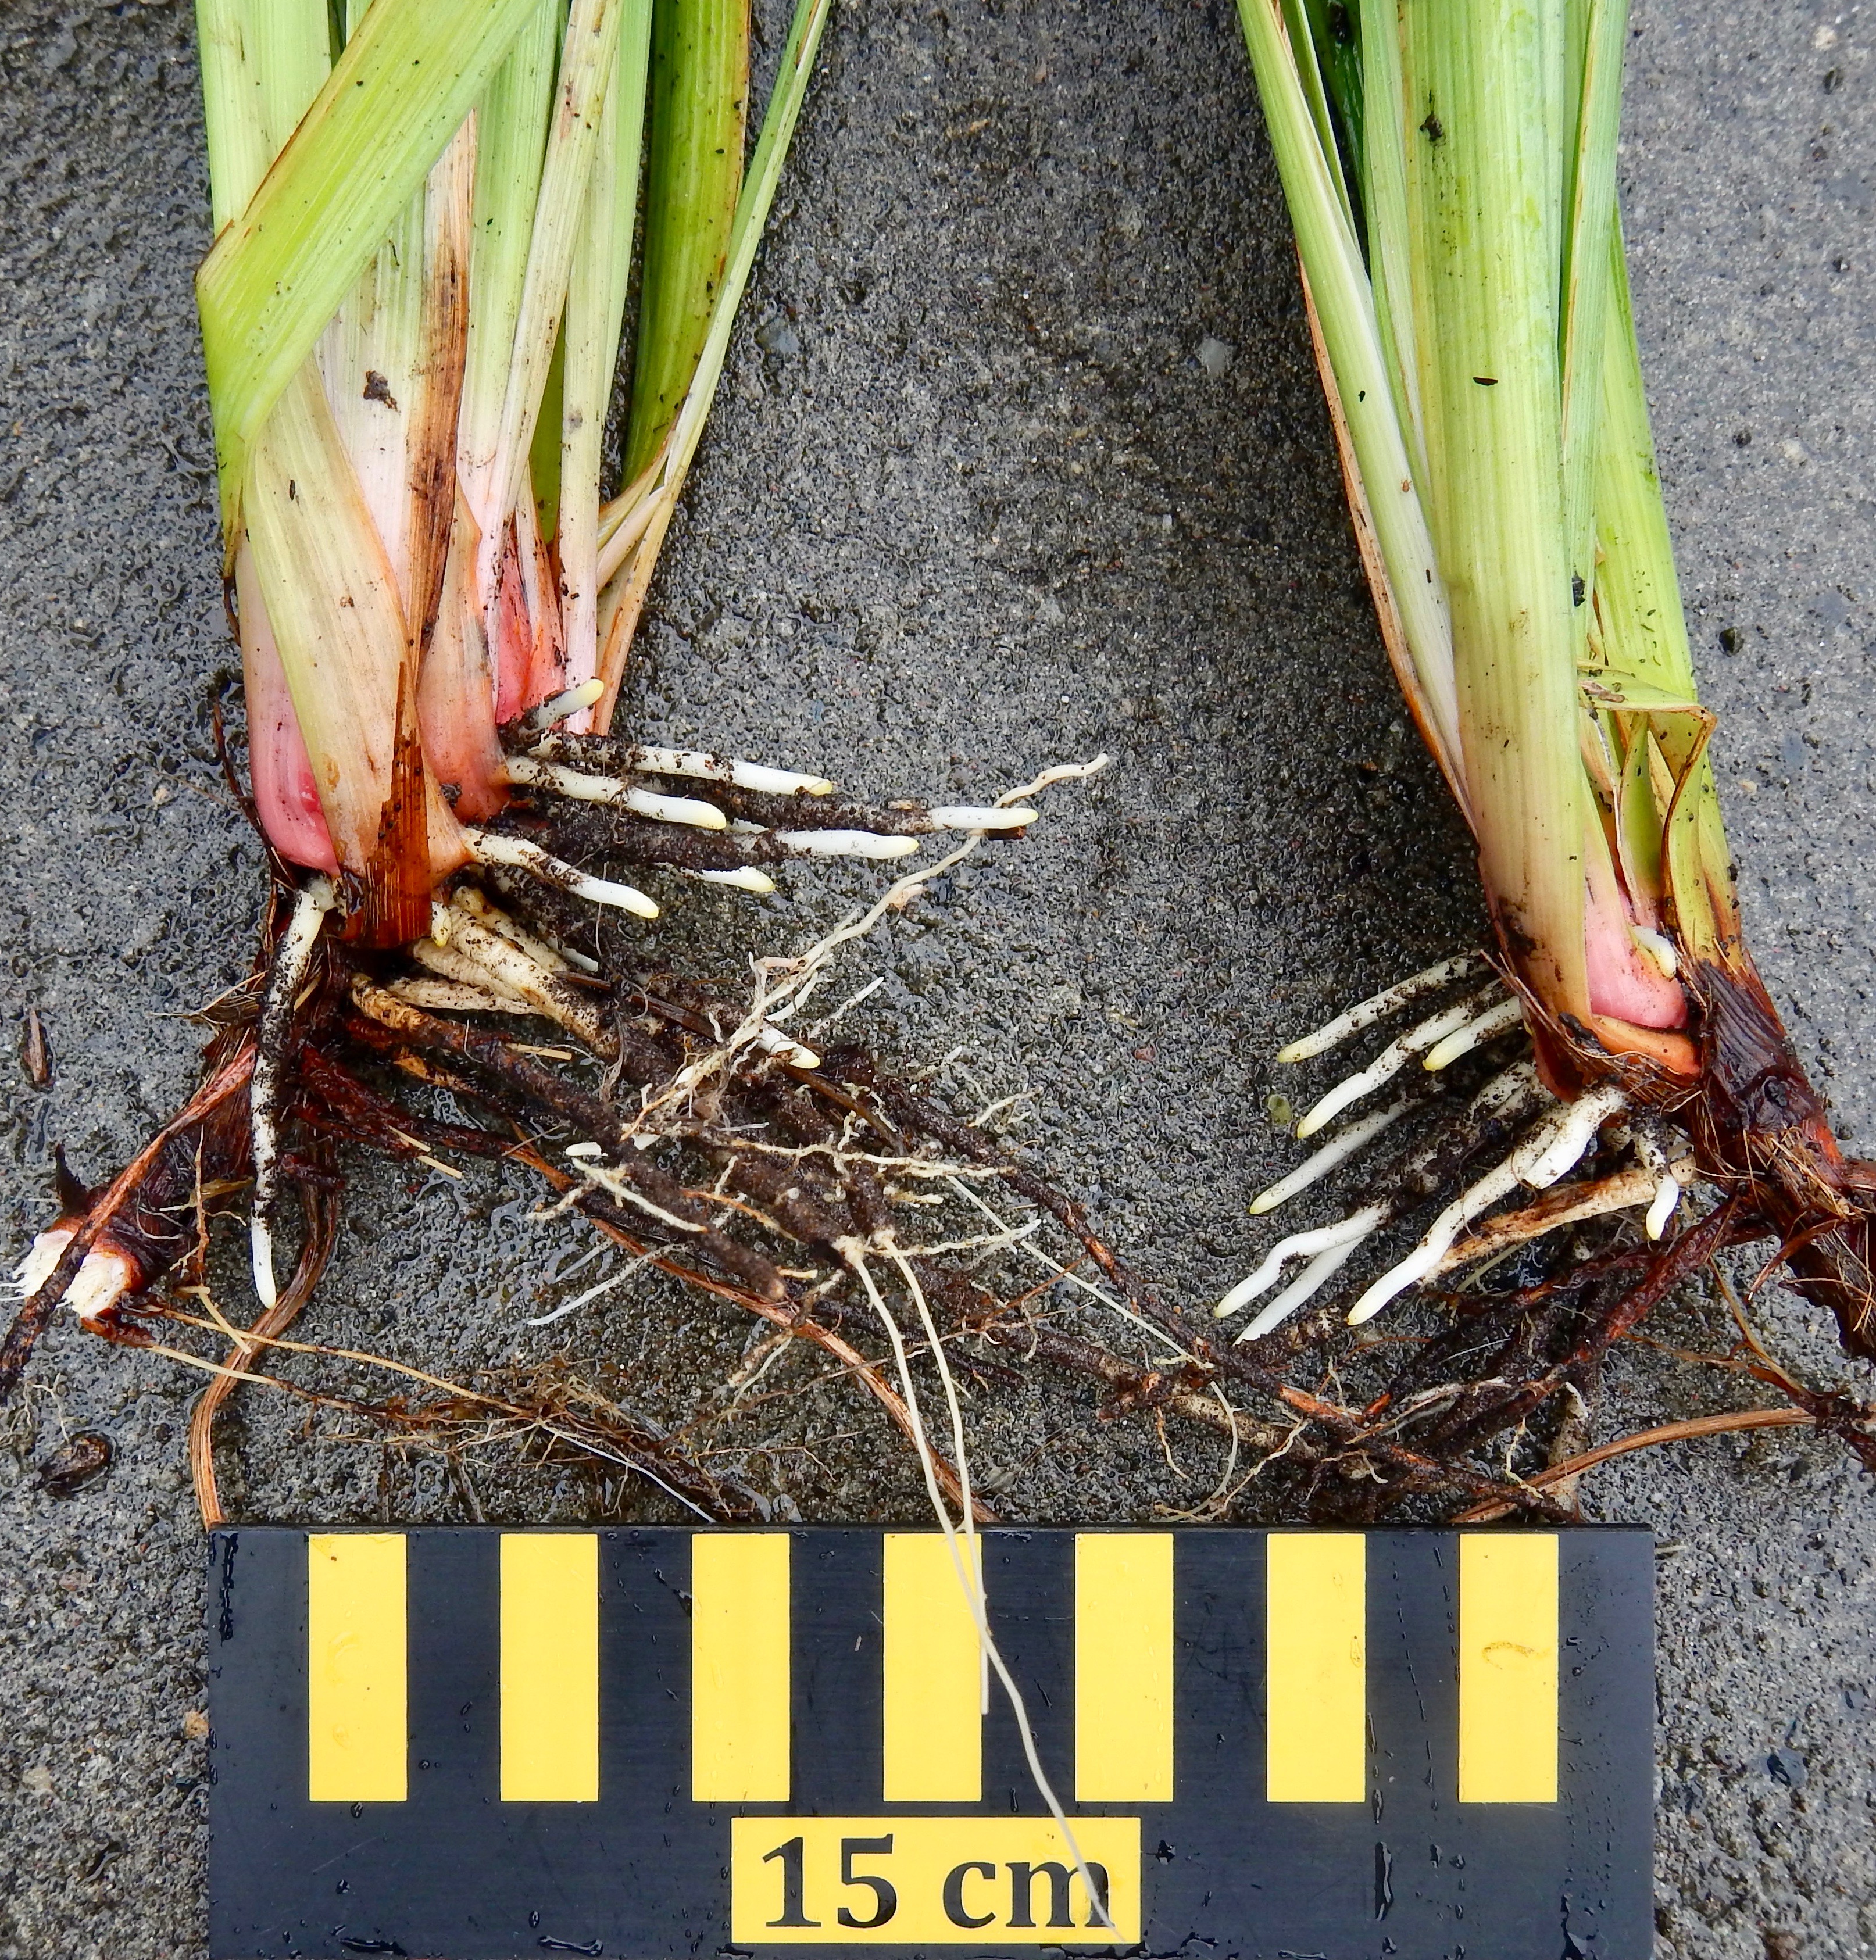
Monitor weather for rain, and wait for the soil to dampen to a depth of at least six inches (or irrigate your garden). When new iris roots emerge, start planning times to rework and plant flower beds. Better yet, consider scheduling a planting party! Along the coast, this is usually October into November. 

Take time to replenish soil coverings (aka mulches), and amend soils with nutrients and carboniferous materials like compost, ramial, and biochar. Any time you dig a plant hole, add some carbon, work it into the hole, and then replant. My preferred carbon-rich materials and sequence (bottom to top) are: biochar, compost, ramial, wood chips. 

Although I make my own compost, I never have enough. Ants, mice and voles haul seeds around, and seem to like dragging grass seeds and some dicots into my compost piles. If you can get it, compost from methane digesters is seed free. 

When I rework beds, I layer biochar and compost over the open garden bed that is ready to replant. Then I plant into this area, working the carbon materials down and around each hole and the roots. I may also add more compost on top, below the top layers (ramial and wood chips). 

Ramial is a freshly shredded blend of hardwood stems and leaves, like shrub and tree branches. During fall cleanup I shred hardwood branches before leaf fall, and put these chips out as a top dressing on garden beds. This mix breaks down easily without needing extra nitrogen, and helps boost carbon in the soil. It’s almost as good as foliar sprays for plant health. Like compost, I never have enough ramial. 

Biochar is charcoal, pretreated with compost to inoculate it with microorganisms, and is usually ground into a coarse powder. It helps soils retain water and nutrients, and promotes good soil structure. It’s especially a boost for beneficial soil fungi, which helps promote healthy roots in Pacifica iris.
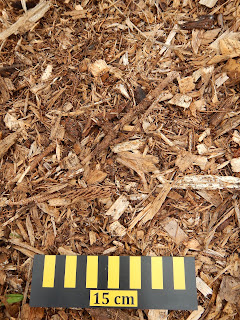
Perennials thrive with wood chip mulches. We have trees, which regularly need limbs removed. I chip them, and turn the resulting wood chip pile to compost. Fungal mycelia appear throughout the wood piles within a few weeks. When I add these chips to an iris bed, fungi are coming with them. Fungi are beneficial for both the soil and my plants. 

If wood chips are too coarse when fresh, run them through a chipper.  (NOTE: I have learned the hard way to wear a mask when chipping—my lungs do not care to inhale wood dust, fine bits of leaves, shredded fungi, or compost fragments. For extra protection, put a bandana over the top of a N95 mask. Eye protection is a good idea too.)

Fine wood chips can also be added to a compost pile. They provide a coarse source of carbon and help break down food scraps for optimal compost texture.
Other soil amendments to add to garden soils during the fall include: eelgrass, dried kelp meal, ground oyster shells, feather meal, and mineral soil amendments. 

Eelgrass mats wash up on the boat ramp at the local port, which gardeners can collect. We have enough rain that we can add it to garden beds, on top of the wood chips, and know the rain will dilute the salt. Otherwise, lay the eelgrass out to compost, let rain wash the pile for a month or two, then spread it.

Winter is coming, but before that season comes fall--the best time to plant, replant and transplant on the West Coast. Enjoy the season!

Monday, September 21, 2015

Autumn: Transplanting time for Pacifica Iris

Kathleen Sayce 
September 20, 2015

Many irises are easy to transplant at any time of year. Dig them up, divide, cart to new homes and tuck in. Clip off some leaves to reduce moisture loss while the new roots form, and away they go. Not so for PCIs. Treat them this way, and they go root tips up before you can find your watering can.

Healthy PCI transplants:  new fans, and healthy new white roots. Both of these I. douglasiana pieces are ready to plant. 

There are two times of year to successfully transplant PCIs: Autumn and Spring.

At these times, PCI roots are in active growth. Check the roots, removing soil gently around the base of a fan or two. If there are white roots, one to four inches long, then get out the shovel and start digging. It's time.

New fans on a PCI, but no new roots yet; this plant needs to wait a few weeks before being divided.


Why Autumn and Spring for root growth? Pacifica Iris are native to the West Coast of North America, which has a Mediterranean climate––during the drought period each summer, these and other native species go dormant. In mild winter climates, PCI may have live roots all winter, but they dry down and wait out dry summers.

Summer drought duration depends on latitude, the farther south you are, the longer the duration, which varies from less than three months to more than ten months on the West Coast. I garden at 46°N, so droughts usually last less than three months, though this year it was more than five.

If you water regularly, PCI initiate new roots earlier in the fall than do those depending on rain. You can divide and transplant much earlier in the fall and later in the spring.

This flat of PCI seedlings has been watered regularly all summer, and is ready to move into the garden.


PCI seedlings in pots are tough, and can stand being transplanted several times in the first year or two of life. Even larger plants, one to five gallons, can withstand transplanting slightly outside the Autumn or Spring periods. These have all had regular water, as they must to live in pots.

Other tips:
Mulch after planting to keep roots cool
Amend soil with carbon, such as compost and biochar
Move plants on cool cloudy damp days rather than on hot sunny days
Add 'Superthrive' (a registered vitamin formula for plants) to the watering can
Water well for a few weeks after planting
Use a dilute liquid fertilizer when watering

Every Autumn I host a 'Come and Dig PCI' day in my garden, to share out plants to other gardens in my community. I checked my plants this week; new fans are starting to form, and new roots are short. I'll wait a week or two, until new roots are more than an inch long. 

There are exceptions; one variety has long white roots and could be divided now, but it will tolerate moving in a few weeks. The seedling PCI can be planted anytime from now until early November. They are much tougher than fan sections, which is why growing PCI from seed is so successful for many gardeners. Society for Pacific Coast Native Iris will hold its seed exchange from 1 November to the end of the year, so now is the time to be thinking about what species and hybrids you'd like to grow in your garden from seed. 

New white roots, this PCI is ready for a new home.


For western gardeners, Autumn is the best time to plant many native plants, not just Pacifica Iris. Trees, shrubs, perennials, ferns and grasses all do well if planted now (late September to early November), as the weather cools and moisture arrives from the Pacific Ocean over western North America. This gives the plants a jump on growth for the coming year by establishing good root systems first, with much less water use now and in coming years. 

Monday, July 8, 2013

Horticultural Vermiculite: For iris gardens from clay to sandy soil


It's almost time to dig and divide your irises... so now is the perfect time to take a look at soil amendments for better plant health. One of my favorite amendments is horticultural vermiculite. My southern bearded iris garden would not be possible without it, but even my moisture-loving Louisiana irises are happiest when this beneficial amendment is included in the soil blend. No matter what your climate or soil type, the addition of horticultural vermiculite can have a positive effect in your garden. 


'Flying Down to Rio' (Moores 2005) planted in vermiculite-amended soil

Vermiculite is a naturally-occurring geological material, more specifically a group of aluminum-iron magnesium silicates that closely resemble mica. When processed for horticultural use, vermiculite is introduced to intense heat, causing it to expand into multiple layers of very thin plates. The end result is accordion-shaped granules of sterile, disease-free planting medium. Vermiculite has been used by nurserymen and gardeners for decades, in potting soils and outdoor mixes, in turfgrass and outdoor plantings, for 100% vermiculite growing applications, and for hydroponic growing. Horticultural vermiculite improves soil aeration, assists in temperature regulation, and retains moisture and nutrients necessary to feed rhizome roots for superior growth.


Close view of coarse-grade horticultural vermiculite

Consider the following reasons for using horticultural vermiculite in your iris garden:
  • Soils amended with horticultural vermiculite are better able to retain air, nutrients, and moisture, and release them to the plant as needed. Therefore, a planting medium mixed with vermiculite promotes faster root growth for quick anchorage of newly planted rhizomes.
  • Because vermiculite has cation exchange properties, it holds ammonium, potassium, calcium and magnesium and makes these trace minerals available to the roots as needed.
  • Horticultural vermiculite is a perfect growing culture for irises. The pH of vermiculite is neutral to slightly alkaline (7.0-8.0). It will not deteriorate quickly like most planting materials, and it will not turn moldy or promote rot.

SOIL AMENDING OR CONDITIONING
Coarse grade vermiculite is preferred for outdoor horticultural uses, though medium grade may also be used. With heavy soil, the addition of vermiculite creates much-needed air channels to greatly improve soil aeration. When soil is sandy, the addition of vermiculite helps the soil retain much-needed moisture. Soils may be amended up to a rate of two parts soil to one part vermiculite.

With a large garden area, you may choose to condition only the planting rows. If this procedure is continued for three to four digging cycles, the entire garden area will eventually be conditioned. Because horticultural vermiculite is inorganic, it will continue to function for many years.

Medium grade vermiculite is preferred for potting applications. When used in potting new rhizomes, vermiculite improves soil aeration and diminishes the risk of tender roots breaking as the irises are transferred to the garden. If starting with commercial potting soil, check the label before adding vermiculite, as it may already be present. If making your own potting mix, vermiculite may be added up to a ratio of one part compost material or soil to one part vermiculite.


Planting mix of two parts soil and one part horticultural vermiculite

SUMMER MULCH
If you live in an area that has little to no summer wind, you can use vermiculite to mulch around the rhizomes in the hottest summer months. Vermiculite acts as a constant reservoir of moisture without promoting rhizome rot, protecting your irises from dehydration and scorching during dry spells. This can be especially helpful immediately after digging time, when replanted rhizomes are settling in. After the intense heat passes and winds return, you can remove the vermiculite mulch and save it for use in potting or amending the following year. Or, you can mix it into the soil in other areas of your garden. Used as a mulch, vermiculite may be applied up to 3 inches thick.

FLORAL ARRANGEMENTS
After your irises begin blooming, you will want to bring some of those lovely blooms inside to enjoy. Fill a vase with vermiculite, saturate with tap water, and allow the vase to sit for a few minutes. Repeat this process until the vermiculite is no longer absorbing and water is visible on top. Then, pour off the excess water. Arrange your flowers as you would normally. Your flowers will remain fresh for many days without refilling, and the stems won't develop that unattractive slime that normally occurs when a stem sits in water. When placing flowers in vermiculite, be sure to cut the stems at a slight angle to facilitate wicking.


Flowers being arranged in a vase filled with water-saturated horticultural vermiculite

HOLDING OR SHIPPING RHIZOMES
Vermiculite can also be used at digging time. After you have provided a bleach bath for your newly dug rhizomes, allow them to air dry in the sun. Be careful not to let them bake; the idea is to let the exterior dry without dehydrating the interior. After the rhizomes are fully dry, place them in a storage container and pour vermiculite around them. The vermiculite will prevent moisture fluctuation during the storage period and will provide protection against temperature changes. Though iris rhizomes should never be stored long-term like a bulb, use of vermiculite allows your rhizomes to stay fresh many days longer before replanting. An exact length of time cannot be predicted here, as the timing is dependent on the hydration level of the rhizome (internally) prior to placement in the vermiculite. Vermiculite can also be used when shipping rhizomes to friends.


Rhizomes being placed into a shipping box filled with horticultural vermiculite

A FEW WORDS ABOUT SAFETY
In the past, you may have heard about a link between vermiculite and trace amounts of asbestos. For almost seventy years, vermiculite was used safely and effectively for many purposes, including construction and industrial applications. Then, in 1990, asbestos particles were discovered in vermiculite originating from a mine in Libby, Montana. This mine was primarily used to produce vermiculite for industrial, not horticultural, applications, under the tradename Zonolite. The discovery brought worldwide production of vermiculite to a screeching halt as scientists and regulators worked to determine if any other mines were contaminated. Since that time, strict inspection and safety procedures have been put in place. Though a warning label may still appear on the bag due to past Libby-related incidents, vermiculite is not listed on the OSHA List of Hazardous and Toxic Substances. Gardeners can feel confident that the horticultural vermiculite found in stores today is non-toxic and safe for use in their garden. Just remember, it is wise to use caution when working with dusty garden amendments of any type, including use of a dust mask and watering the garden area prior to application. 

What amendments have been useful in your garden? Post your comments below!

Learn more about horticultural vermiculite with these resources:
Material Safety Data Sheet for Vermiculite, SunGro Horticulture, issued March 1, 2008. This publication details the chemical and physical properties of vermiculite, verifies that vermiculite is not considered a hazardous or  toxic substance by OSHA, and provides useful supplemental information.
EPA Sampling and Analysis of Consumer Garden Products That Contain Vermiculite, August 2000. This report details the results of the first large-scale study of consumer garden products that contained vermiculite. Since the publication of this report, significant advances have been made in the processing and inspection of horticultural vermiculite sold to consumers.